sarah-wach.github.io
Workshop — IoT (Organic Electronics)
Physical Computing with Drawn, Organic Electronics In this exercise block we are going to investigate new approaches of interaction design with smart paper to create interactive posters, books, cards, wallpapers, packagings, … The tool shelf I send to you is pretty simple: a pencil, some wires and (the brain) an ESP32. Furthermore you need and USB Micro cabel and paper (and of course additional material, such as wires if you want to create an interactive system based on more then just one input sensor).
Concept Idea: My little sister is learning to play the piano and usually has lessons to get better at it. Due to the pandemic, her exercises are very sporadic right now.. So I thought a mini piano could be set up in a convenient place in the house so she can stay in practice. After activating, a specified part piece of music, which is to be practiced, is played through a speaker. Then a tone is sounded to indicate that it is the player’s turn. During the exercise, red and green LEDs light up to show whether everything has been done correctly. The individual keys of the piano can be touched and are linked to the GPIOs by using wires.
Jump directly to the final result.
first setup Material:
- ESP 32
- pencil
- alligator clip
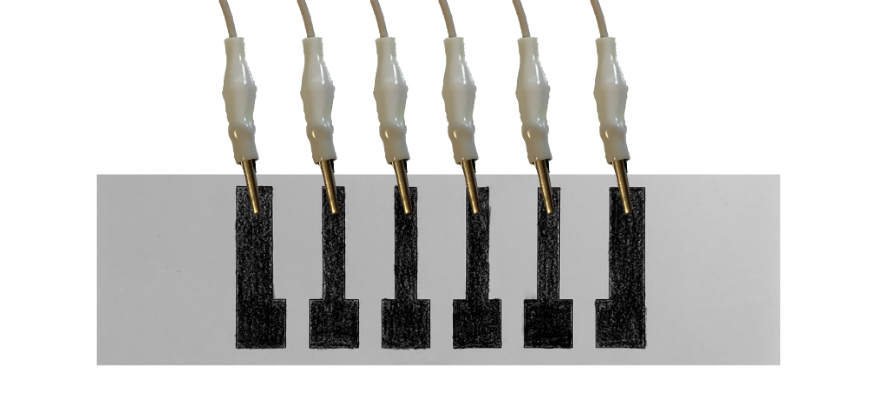
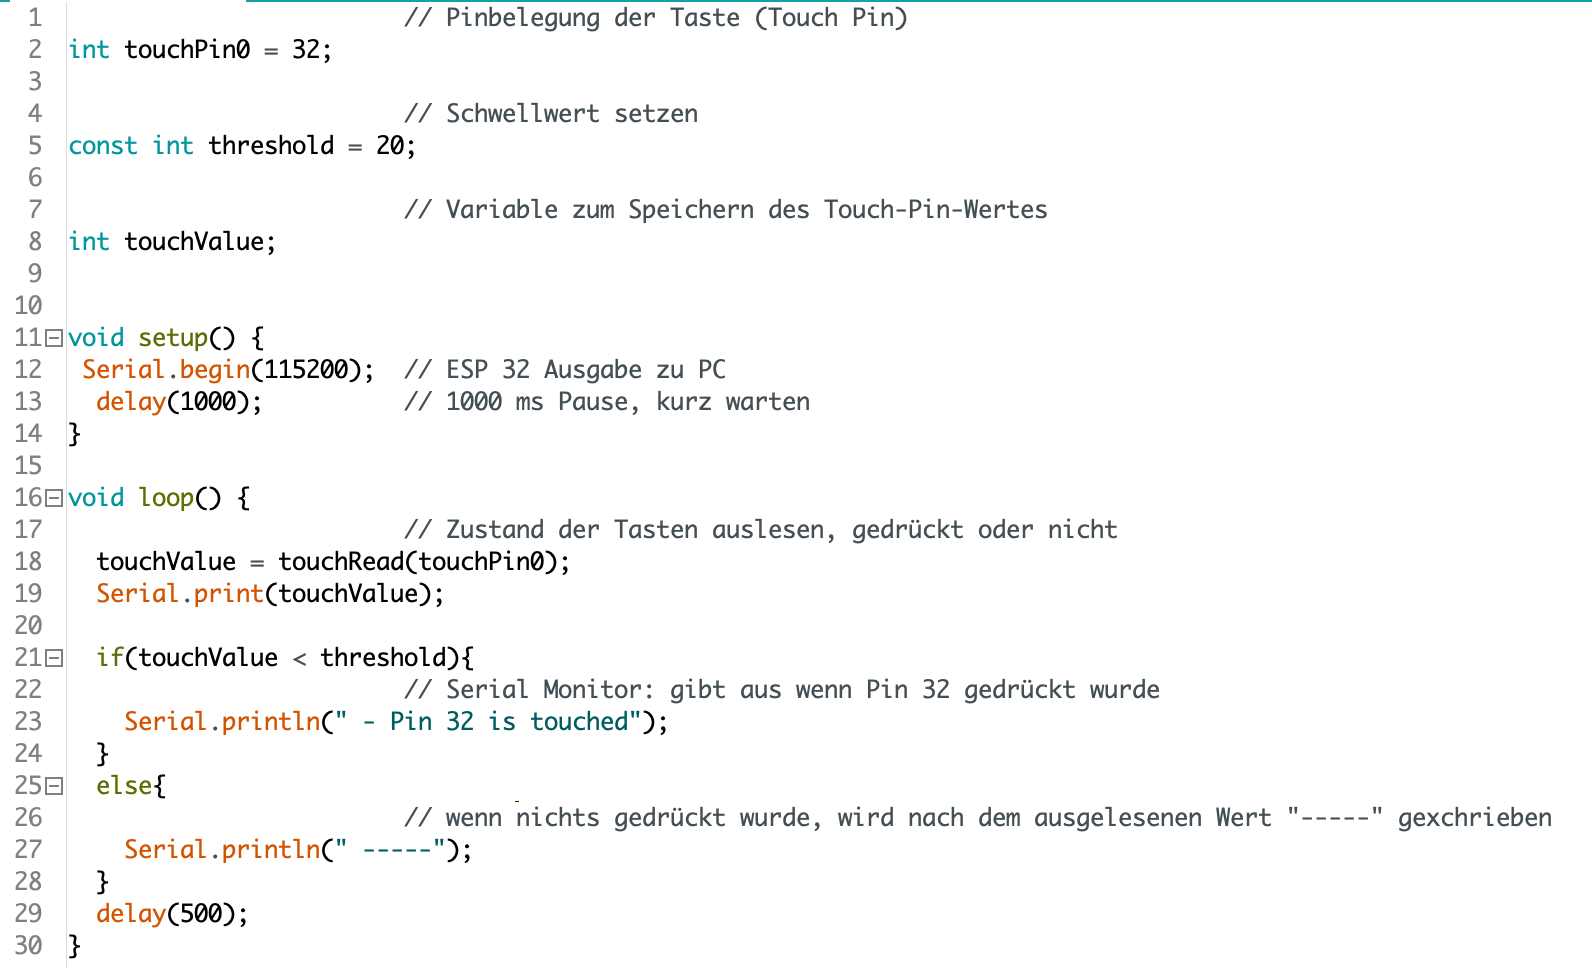
To test the piano, I drew simple keys with a pencil. First, I connected one of them to the ESP 32 with the alligator clip and wrote a test sketch.
second setup Material:
- ESP 32
- pencil
- more alligator clips
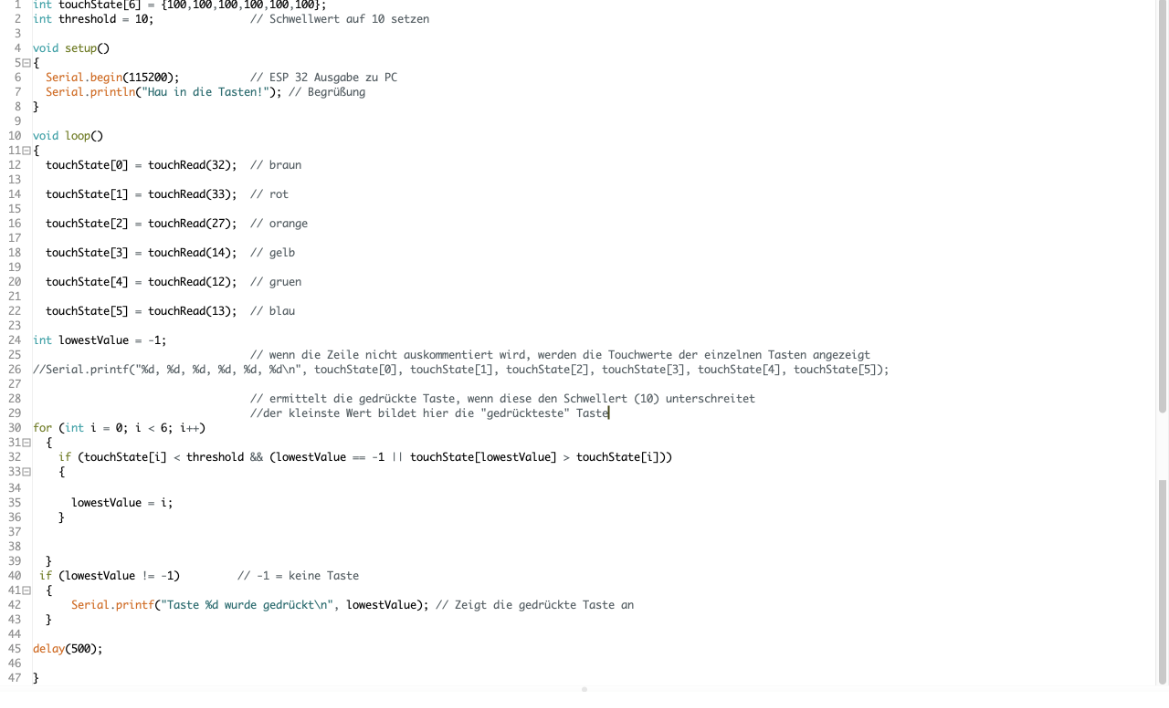
After that, I attached more alligator clips to the painted keys to be able to play all the keys. I have extended the code accordingly.
third setup Material:
- ESP 32
- DFPlayer Mini MP3 Player
- micro SD Card
- some jumper wires
- some alligator clips
- red led
- green led
- 3x 1kΩ resistor
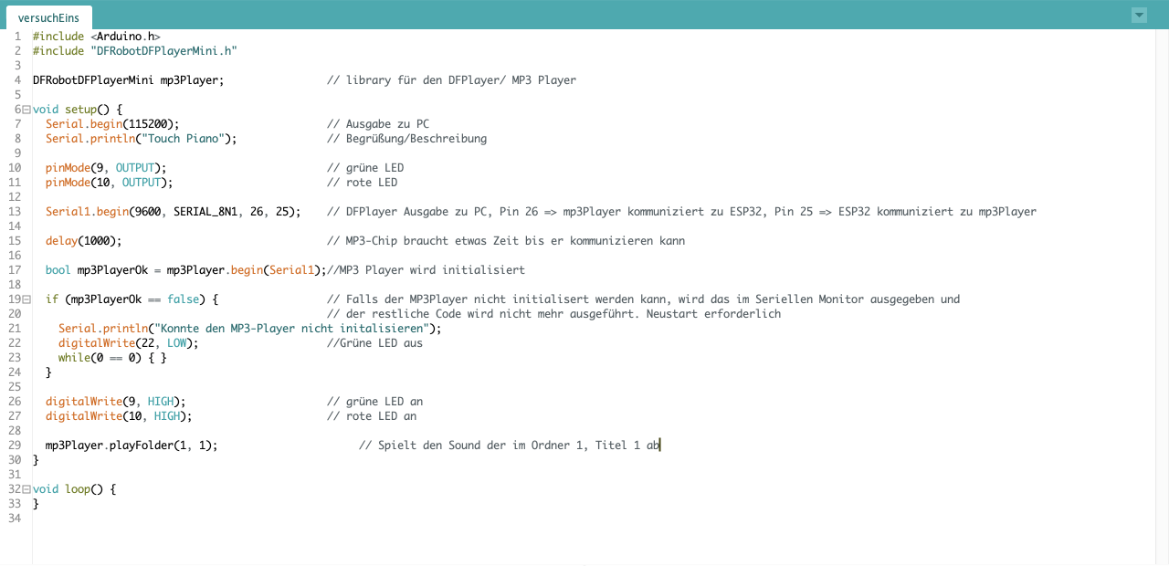
In the next code file, a sound is played for the first time.
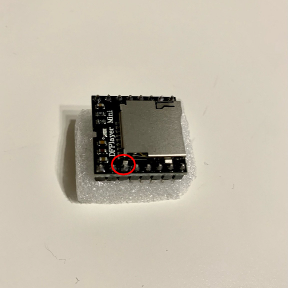
During the test setup for my “touchPiano” I noticed that the DFPlayer is not working properly. In this case, this means that the manufacturer soldered on one spot too many. It took some time to identify the problem. I then ordered a new DFPlayer, which arrived a little later.
With the new DFPlayer, the set-up works.
fourth setup
Next, everything comes together. All six keys can be pressed and each has its own sound which is played when pressed.
Material:
- ESP 32
- DFPlayer Mini MP3 Player
- micro SD Card
- some jumper wires
- some alligator clips
- red led
- green led
- 3x 1kΩ resistor
Exercise: A sample tone is played, which must be repeated. If the correct key is pressed, the green LED lights up and ‘correct’ is displayed on the serial monitor. If the wrong one is pressed, the red one lights up and “wrong” is displayed. When all tones have been played once, the practice session starts again from the beginning.
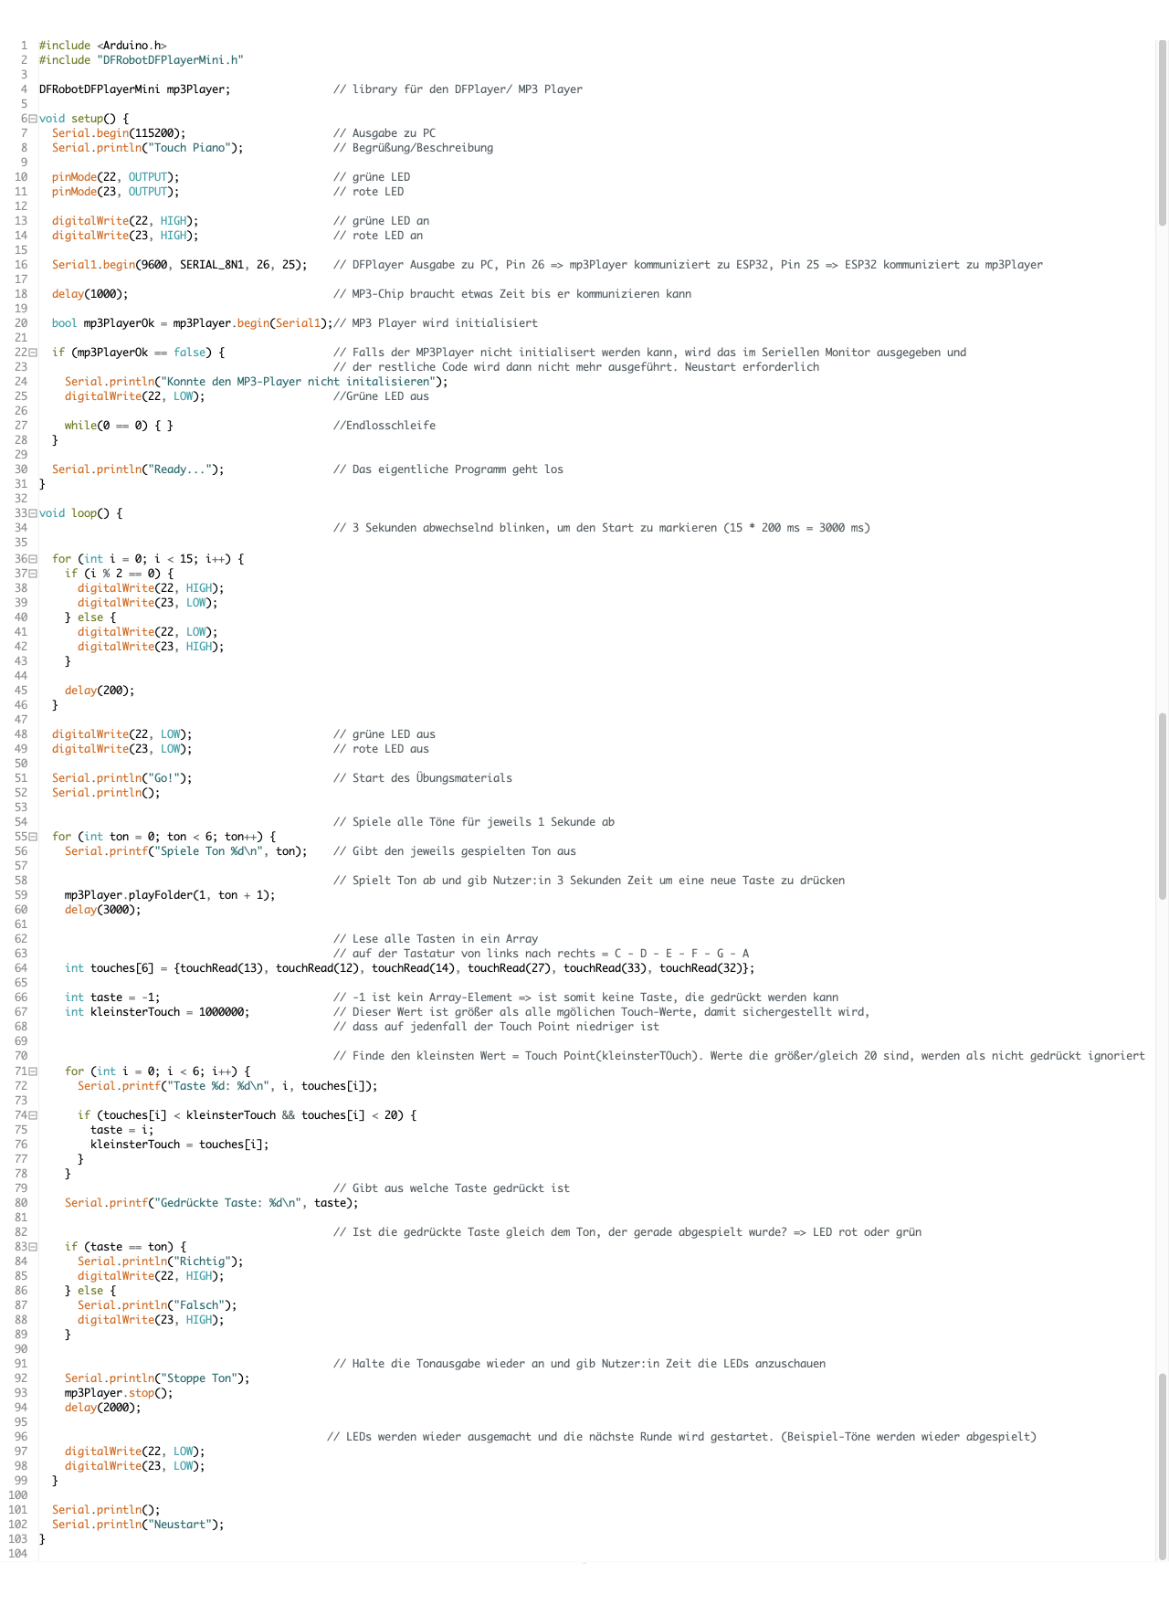
Final setup of "touchPiano"
For the final result, I thought that the exercise task could be a little different. Instead of practicing one tone at a time, a sequence (the scale) is played. This must then be repeated. The green LED lights up for each correct key. For incorrectly pressed keys, the red LED lights up. Each time a key is pressed, the matching tone is played.
Material:
- ESP 32
- DFPlayer Mini MP3 Player
- micro SD Card
- some jumper wires
- some alligator clips
- red led
- green led
- 3x 1kΩ resistor
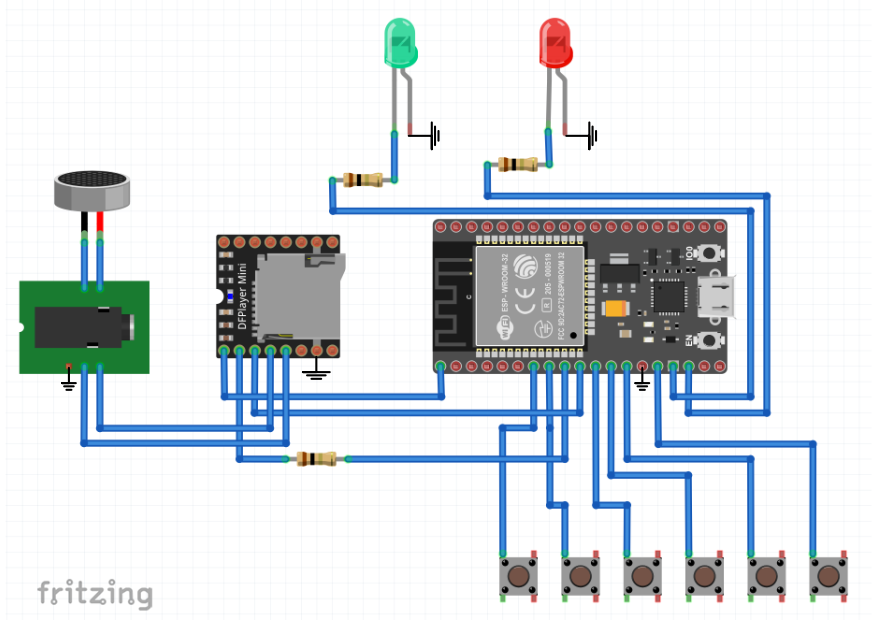
Here you can see the first structure “touchPiano”. Created with Fritzing.
Assigned pins:
- IO 32 Button/Taste 1
- IO 33 Button/Taste 2
- IO 27 Button/Taste 3
- IO 14 Button/Taste 4
- IO 12 Button/Taste 5
-
IO 13 Button/Taste 6
- IO 25 Communication to DFPlayer Mini
-
IO 26 Communication from DFPlayer Mini
- D2 led
- D3 led
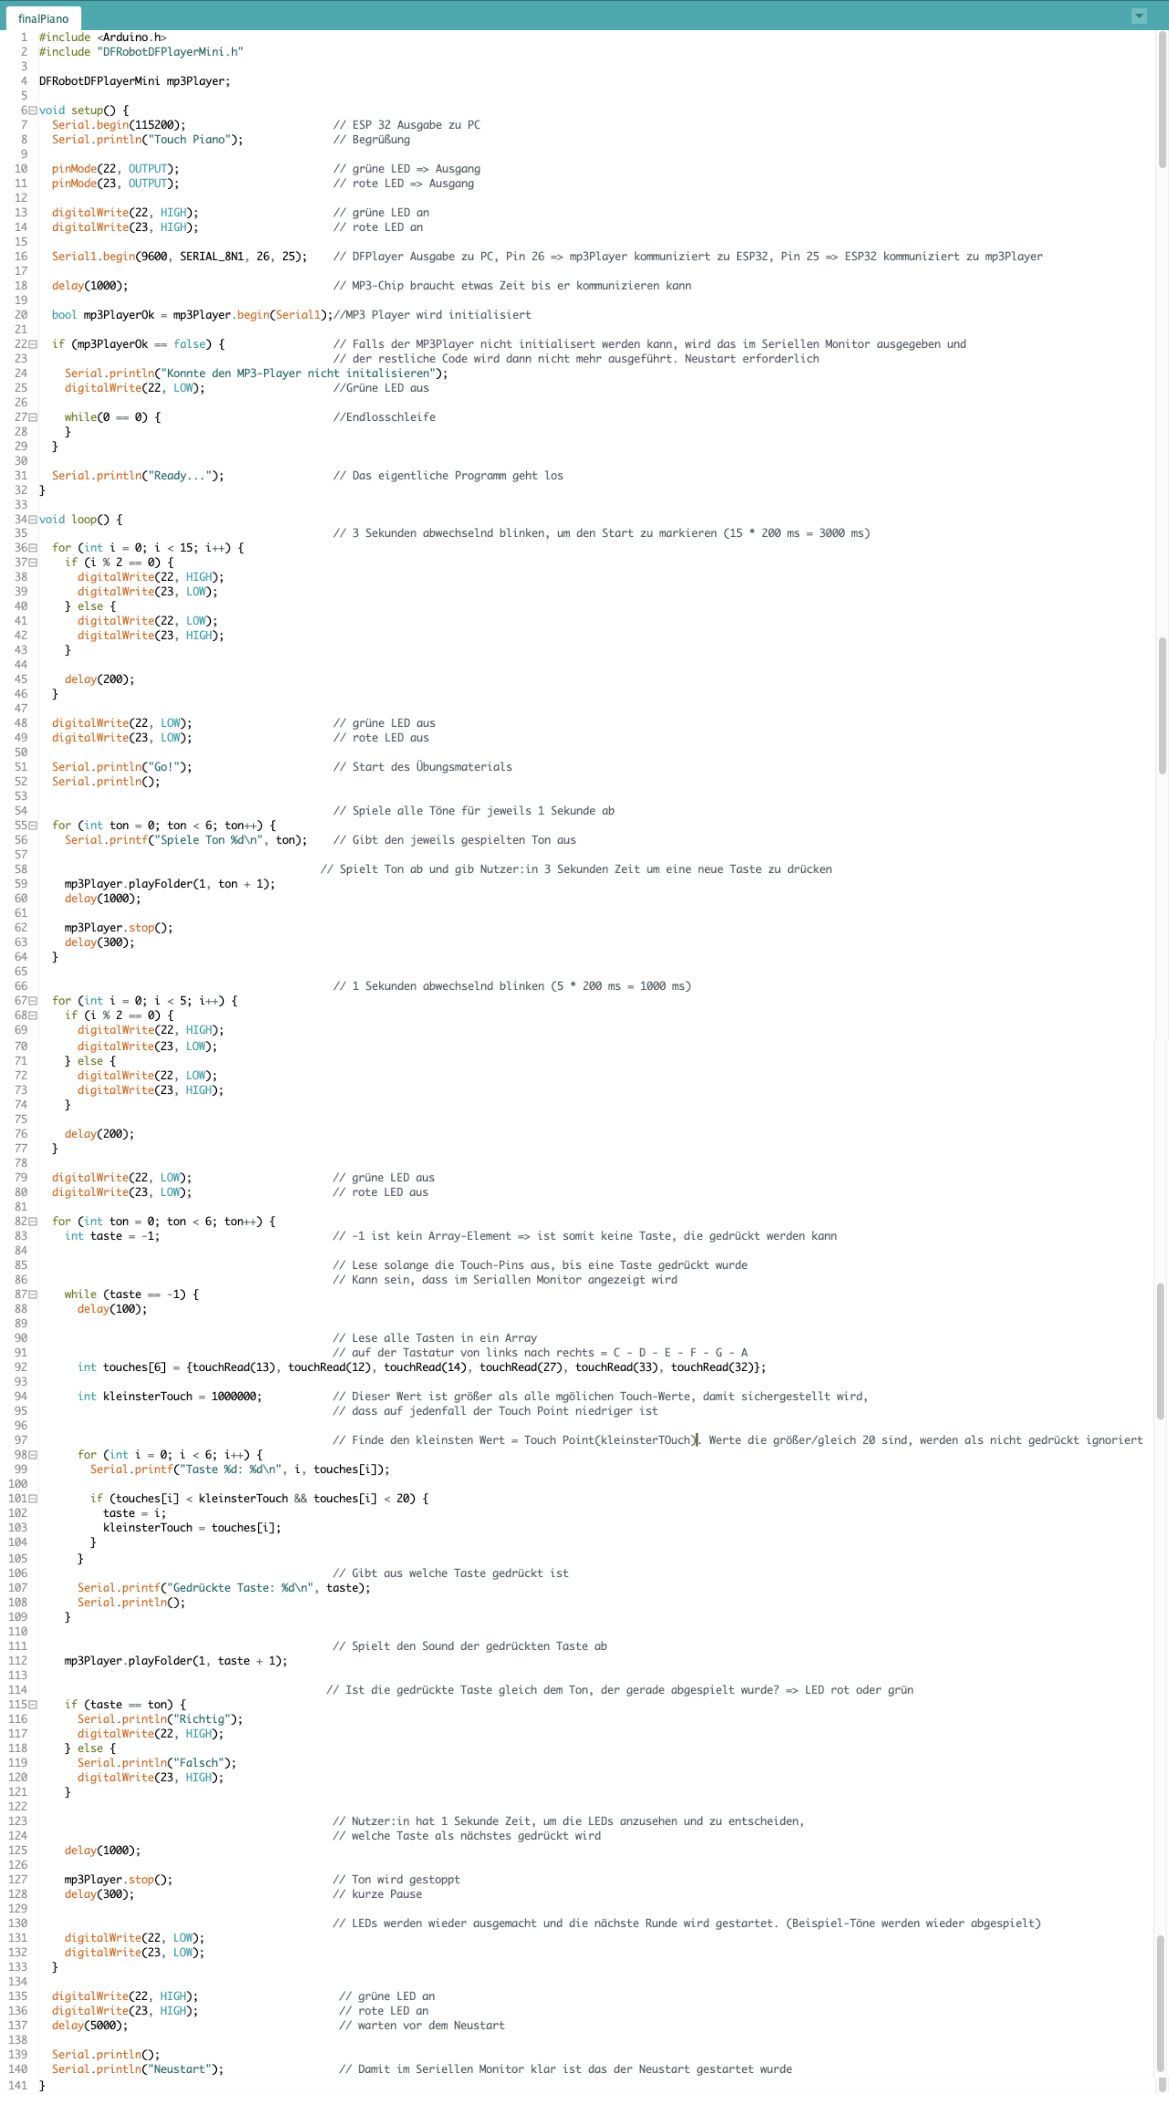
Here you can see my piano working. First, a sequence of tones is played. This is then imitated. The LEDs light up red or green. The serial monitor also shows the data of the individual keys and whether the sequence was reproduced correctly. I replaced the graphite keys with thick aluminum foil keys, as this increases the conductivity. Also, the aluminum foil does not rub off after a few practice rounds.
This is my final code for my piano idea.